React - Routing with Browser Router (LEGACY)
 React Router Demo GIF
This project demonstrates how to set up a React project with the react-router-dom package to enable routing in a single page application with Browser Router.
Packages
- React Router Dom -
npm install react-router-dom - Tailwind CSS -
npm install tailwindcss - Nano ID -
npm install nanoid
Steps
Tailwind CSS Installation & Configuration
- start your react-vite project with
npm create vite@latest <name of project>and change directory to the project folder withcd <name of project>. - Install the packages with
npm install. - Install Tailwind CSS for vite according to this documentation guide:
npm install -D tailwindcss postcss autoprefixer- Install the required packages.npx tailwindcss init -p- Create the Tailwind CSS configuration file.
- Create a
tailwind.config.jsfile in the root of the project and add the following code:
1
2
3
4
5
6
7
module.exports = {
  content: ["./index.html", "./src/**/*.{js,jsx,ts,tsx}"],
  theme: {
    extend: {},
  },
  plugins: [],
};
- Delete the
App.cssfile. - Delete the import of
App.cssin theApp.jsfile. - Delete the CONTENTS of the
index.cssfile. - Add the following code to the
index.cssfile:
1
2
3
@import "tailwindcss/base";
@import "tailwindcss/components";
@import "tailwindcss/utilities";
- Test the installation by adding a Tailwind CSS class to an element in the
App.jsfile.
1
2
3
4
5
6
7
8
9
function App() {
  return (
    <div className="bg-red-500 text-3xl font-bold underline">
      <h1>Hello World</h1>
    </div>
  );
}

export default App;
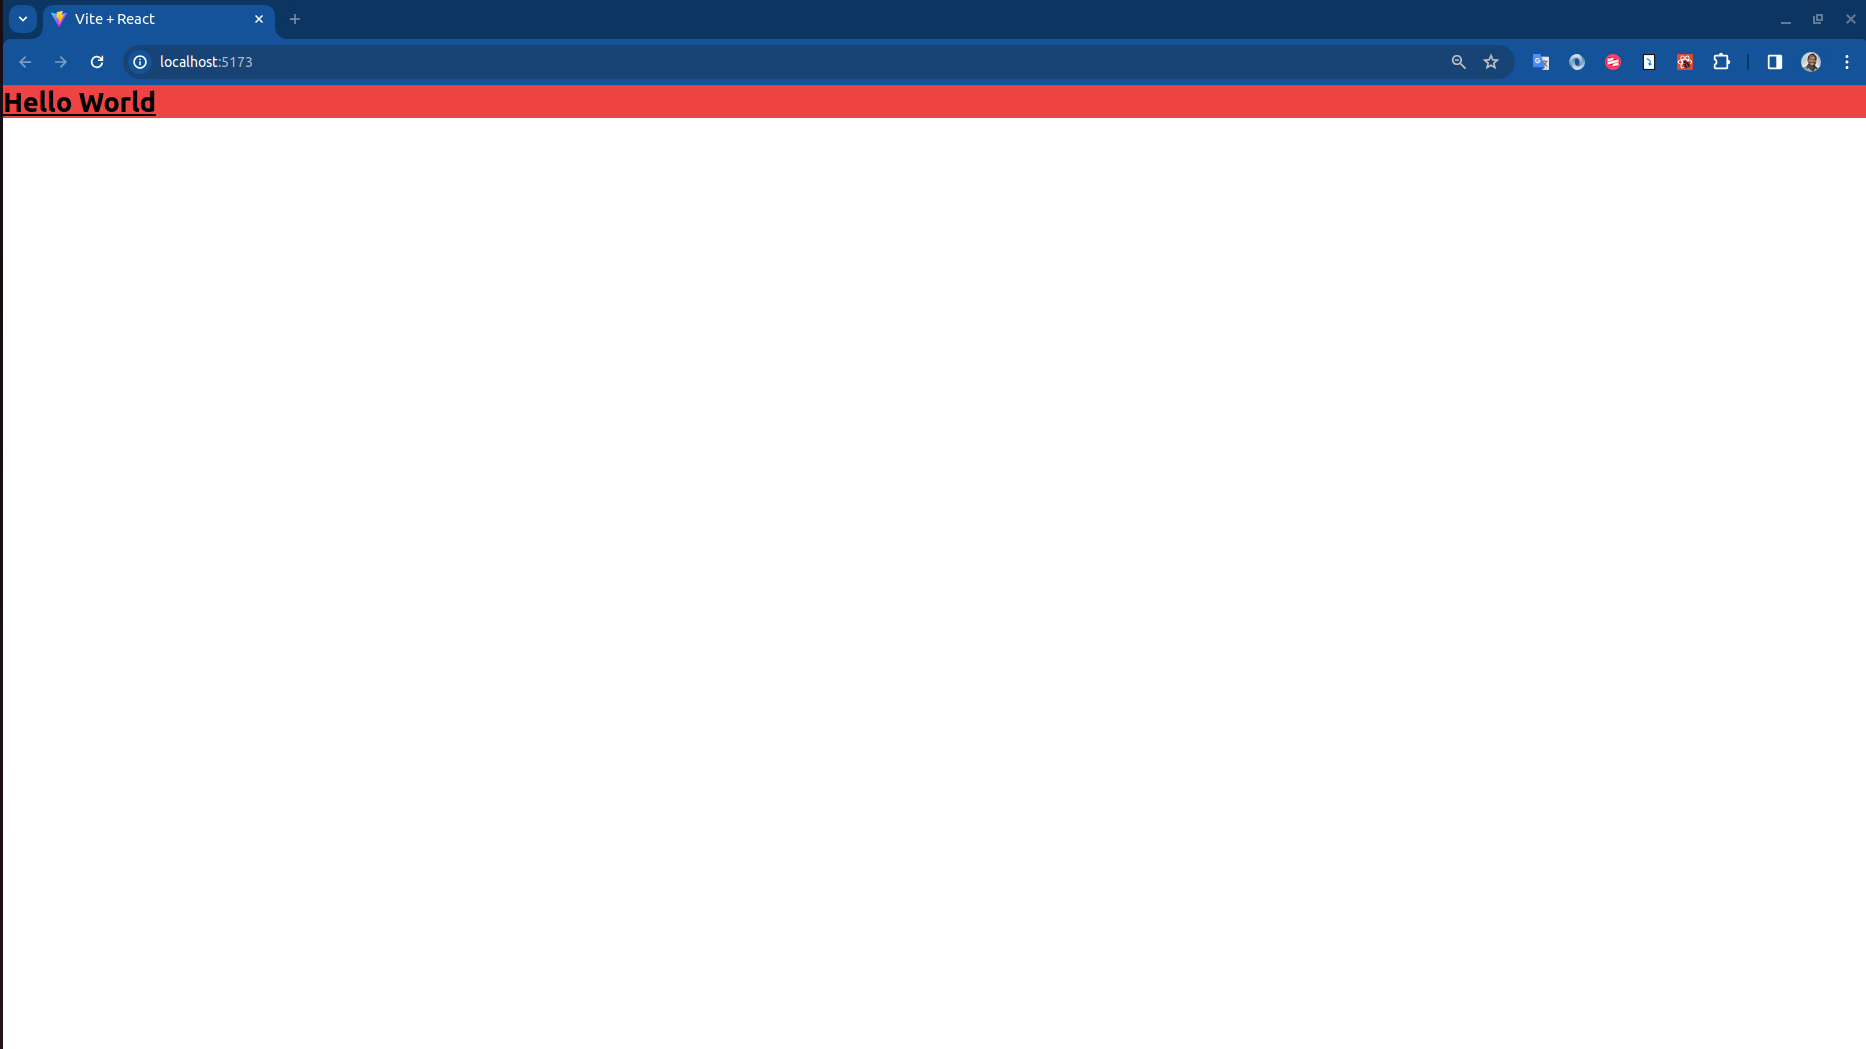 Tailwind installation test
Create some Pages
- Create a
pagesfolder in thesrcfolder. - Create a
HomePage.jsxfile in thepagesfolder. - Create an
AboutPage.jsxfile in thepagesfolder. - Create a
SkillsPage.jsxfile in thepagesfolder. - Create a
ProjectsPage.jsxfile in thepagesfolder.
Each of the pages should be a functional component that returns a div with an h1 tag that displays the name of the page. For example, the HomePage.jsx file should look like this:
1
2
3
4
5
6
7
8
9
function HomePage() {
  return (
    <div>
      <h1>Home Page</h1>
    </div>
  );
}

export default HomePage;
Some Important Questions🤔
- How do we display these pages in the application?
- Do we display them all at once?
NO!- Only one page should be displayed at a time!- We need to display the
HomePagewhen the user navigates to the root URL. e.g.http://http://localhost:5173/- How do we set up the routes for these pages?
- We want to display the
HomePagewhen the user navigates to the root URLhttp://localhost:5173/.- We want to display the
AboutPagewhen the user navigates to the/aboutURL. e.g.http://localhost:5173/about- We want to display the
SkillsPagewhen the user navigates to the/skillsURL. e.g.http://localhost:5173/skills- We want to display the
ProjectsPagewhen the user navigates to the/projectsURL. e.g.http://localhost:5173/projects- How do we navigate between these pages?
- We want to display a navigation bar at the top of the page with links to the different pages.
- We want to be able for example be taken back when we click on
back to homelink on theAboutPageandSkillsPageandProjectsPage.
React Router Dom
React Router Dom is a package that provides routing capabilities to a React application. It allows us to set up routes for different pages in our application and to navigate between these pages.
- Install the
react-router-dompackage withnpm install react-router-dom.
Setting up the Routes
When it comes to setting up the routes, there are several ways to do it. The following implementation is intended to make it easier to understand the concept of routing in a React application.
- Import the
BrowserRouterin themain.jsxfile. - Wrap the
Appcomponent with theBrowserRoutercomponent.
1
2
3
4
5
6
7
8
9
10
import ReactDOM from "react-dom";
import App from "./App";
import { BrowserRouter } from "react-router-dom";

ReactDOM.render(
  <BrowserRouter>
    <App />
  </BrowserRouter>,
  document.getElementById("root")
);
- Import the
RoutesandRoutecomponents in theApp.jsxfile. - Import the pages in the
App.jsxfile. - Create a
Routescomponent that contains theRoutecomponents for the different pages as follows:
1
2
3
4
5
6
7
8
9
10
11
12
13
14
15
16
17
18
19
20
import { Routes, Route } from "react-router-dom";
import HomePage from "./pages/HomePage";
import AboutPage from "./pages/AboutPage";
import SkillsPage from "./pages/SkillsPage";
import ProjectsPage from "./pages/ProjectsPage";

function App() {
  return (
    <div>
      <Routes>
        <Route path="/" element={<HomePage />} />
        <Route path="/about" element={<AboutPage />} />
        <Route path="/skills" element={<SkillsPage />} />
        <Route path="/projects" element={<ProjectsPage />} />
      </Routes>
    </div>
  );
}

export default App;
- Test the application by navigating to the different pages using the links in the navigation bar.
- What happens when you navigate to the different pages? Try out the following:
- Navigate to the root URL
http://localhost:5173/ - Navigate to the
/aboutURLhttp://localhost:5173/about - Navigate to the
/skillsURLhttp://localhost:5173/skills - Navigate to the
/projectsURLhttp://localhost:5173/projects
- Navigate to the root URL
- The pages should be displayed when you navigate to the different URLs. For example, the
HomePageshould be displayed when you navigate to the root URL.
- What happens when you navigate to the different pages? Try out the following:
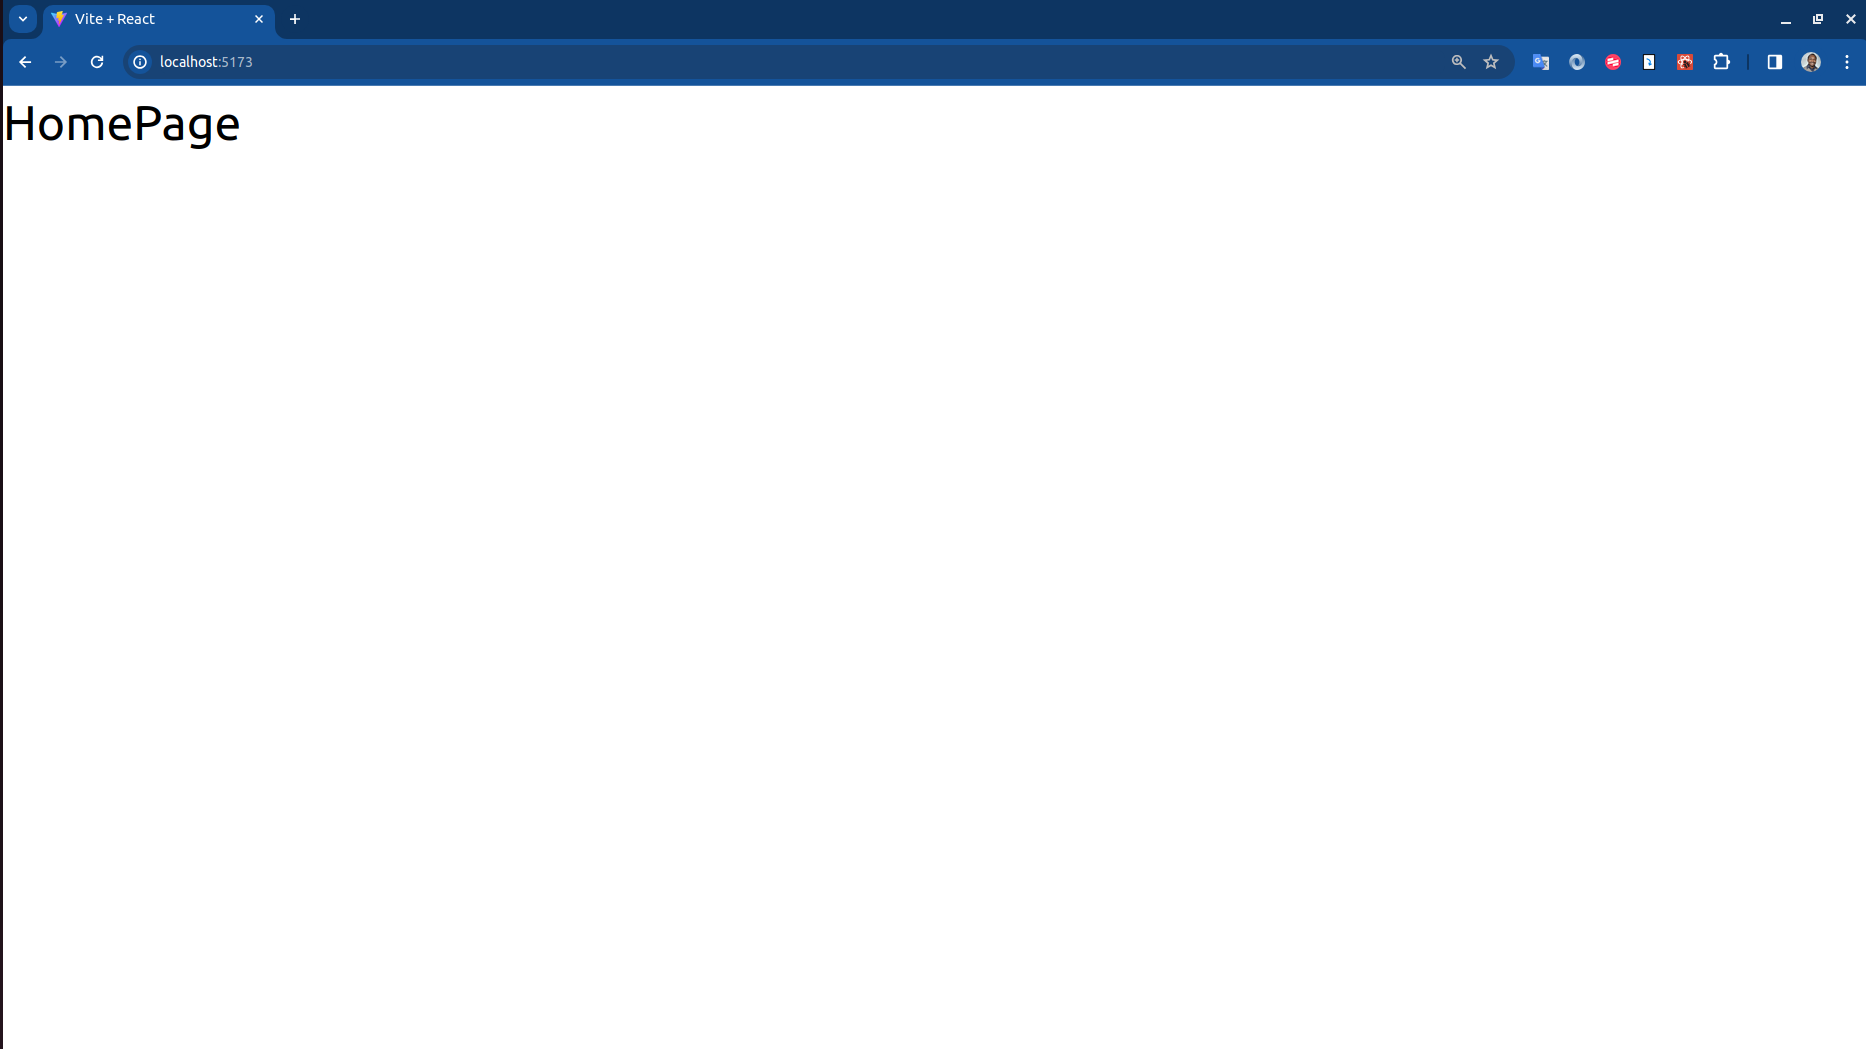 Navigation installation test
Next Questions
- How do we set up the navigation bar?
- How do we ensure that the navigation bar is displayed on all the pages?
- How do we navigate between the different pages?
Navigation Bar
This is also a point where the implementation can vary. The following implementation is just one out of many ways to set up a navigation bar in a React application.
- Create a
componentsfolder in thesrcfolder. - Create a
NavbarComponent.jsxfile in thecomponentsfolder. - Create a functional component that returns a
navelement withulandlielements that contain the links to the different pages.
The Link Component from react-router-dom
- Use the
Linkcomponent fromreact-router-domto set up the links.- The
Linkcomponent is used to set up the links to the different pages in the application. - It is similar to the
atag in HTML but it is used to set up links in a single page application. - The
toprop is used to specify the path to the page that the link should navigate to. - For example, the
toprop for the link to theHomePageshould be set to/. -<Link to="/">Home</Link>
- The
1
2
3
4
5
6
7
8
9
10
11
12
13
14
15
16
17
18
19
20
21
22
23
24
import { Link } from "react-router-dom";

function NavbarComponent() {
  return (
    <nav className="bg-gray-800 text-white p-4">
      <ul className="flex space-x-4">
        <li>
          <Link to="/">Home</Link>
        </li>
        <li>
          <Link to="/about">About</Link>
        </li>
        <li>
          <Link to="/skills">Skills</Link>
        </li>
        <li>
          <Link to="/projects">Projects</Link>
        </li>
      </ul>
    </nav>
  );
}

export default NavbarComponent;
- Can we refactor the
NavbarComponentcomponent and map through the links to display them? Yes, we can. We can use themapmethod to map through an array of objects that contain the links and their paths.
1
2
3
4
5
6
7
8
9
10
11
12
13
14
15
16
17
18
19
20
21
22
import { Link } from "react-router-dom";

function NavbarComponent() {
  const links = [
    { path: "/", name: "Home" },
    { path: "/about", name: "About" },
    { path: "/skills", name: "Skills" },
    { path: "/projects", name: "Projects" },
  ];

  return (
    <nav className="bg-gray-800 text-white p-4">
      <ul className="flex space-x-4">
        {links.map((link, index) => (
          <li key={index}>
            <Link to={link.path}>{link.name}</Link>
          </li>
        ))}
      </ul>
    </nav>
  );
}
- Import the
NavbarComponentcomponent in theApp.jsxfile. - Add the
NavbarComponentcomponent to theAppcomponent.
1
2
3
4
5
6
7
8
9
10
11
12
13
14
15
16
17
18
19
20
21
22
import { Routes, Route } from "react-router-dom";
import HomePage from "./pages/HomePage";
import AboutPage from "./pages/AboutPage";
import SkillsPage from "./pages/SkillsPage";
import ProjectsPage from "./pages/ProjectsPage";
import NavbarComponent from "./components/NavbarComponent";

function App() {
  return (
    <div>
      <NavbarComponent />
      <Routes>
        <Route path="/" element={<HomePage />} />
        <Route path="/about" element={<AboutPage />} />
        <Route path="/skills" element={<SkillsPage />} />
        <Route path="/projects" element={<ProjectsPage />} />
      </Routes>
    </div>
  );
}

export default App;
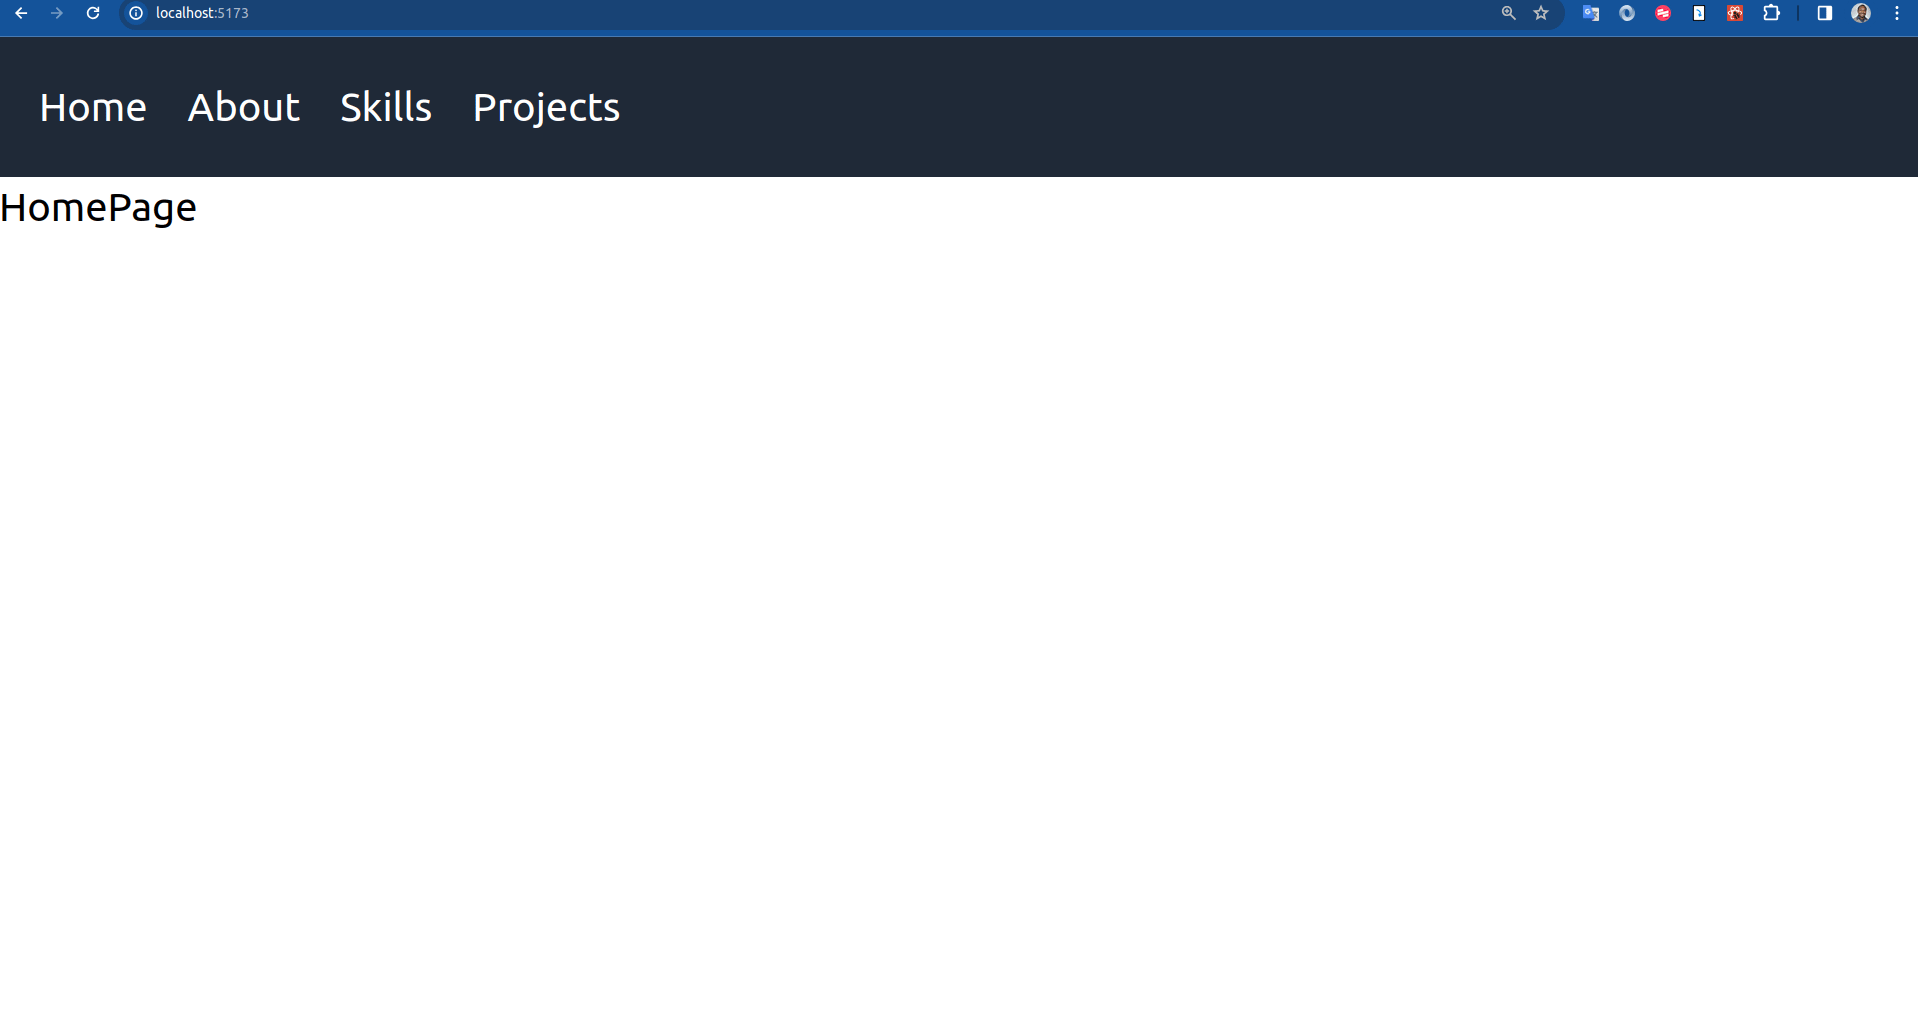
- Do you see the navigation bar at the top of the page?🤔
- Try navigating to the different pages using the links in the navigation bar.🤩
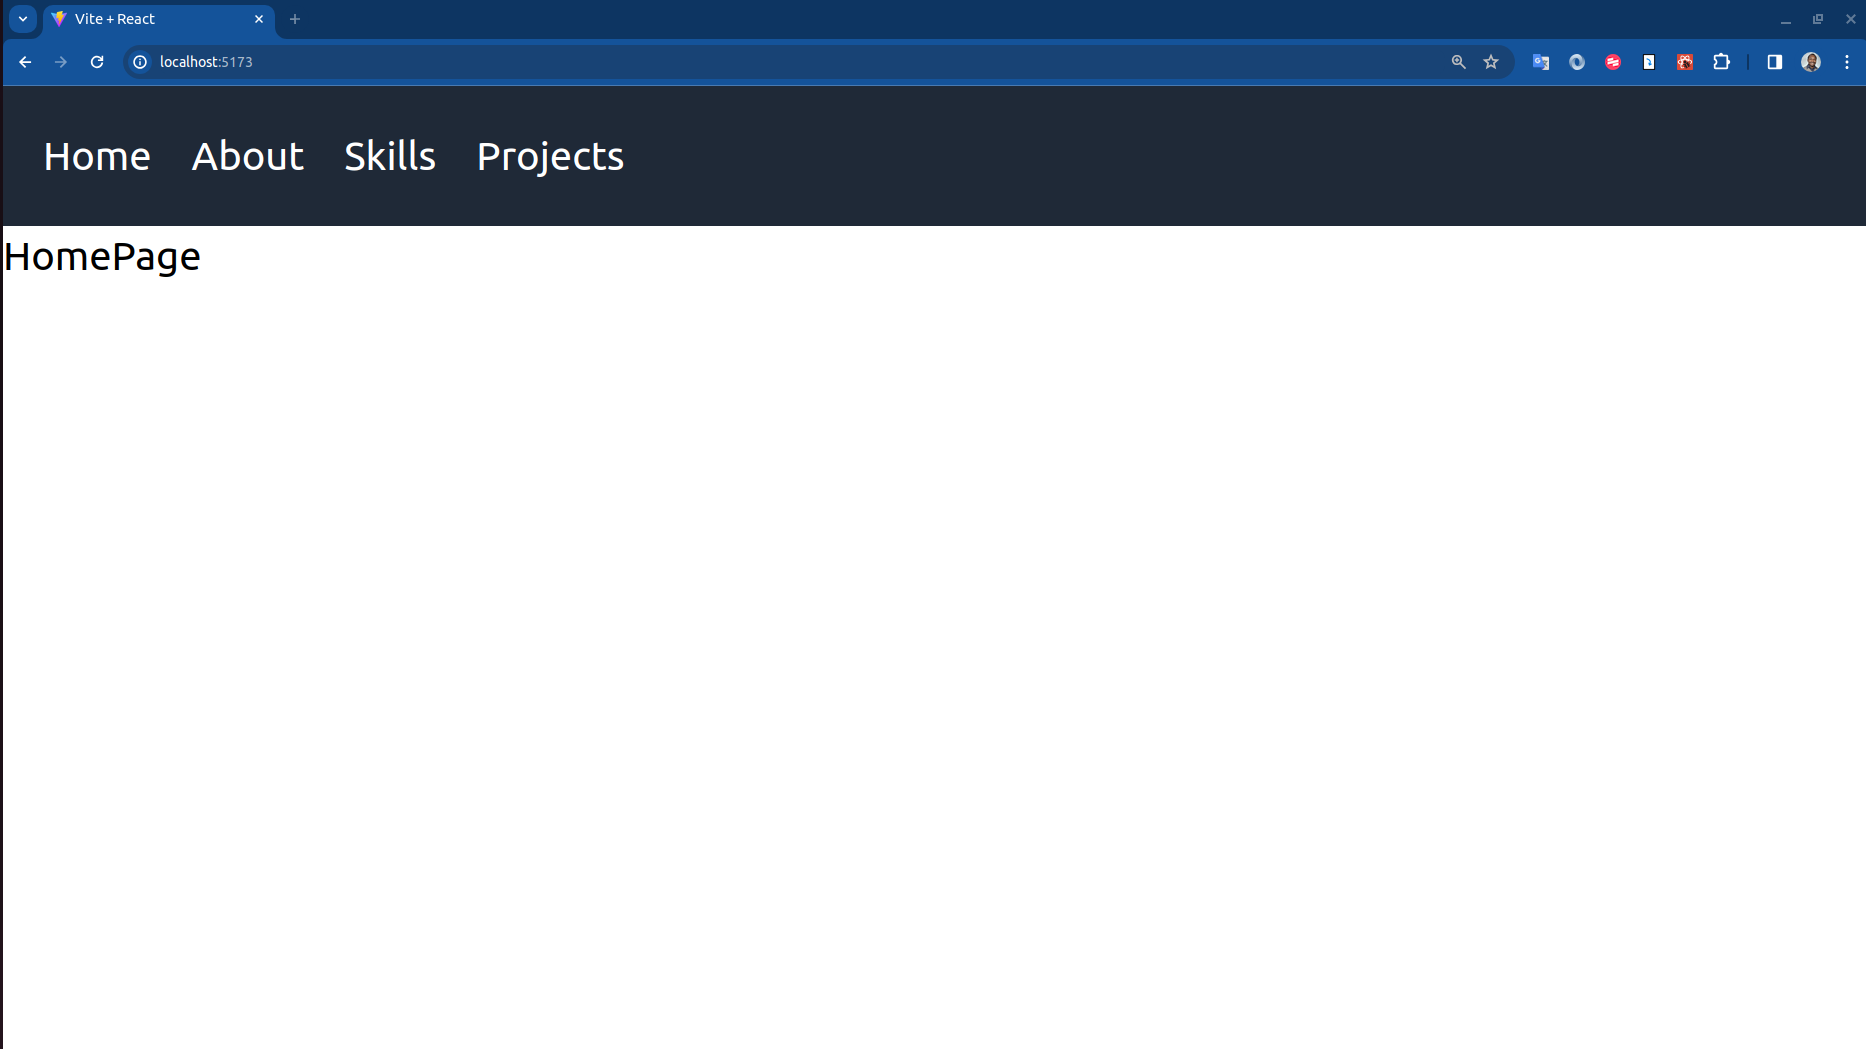 Navigation installation test Home Page
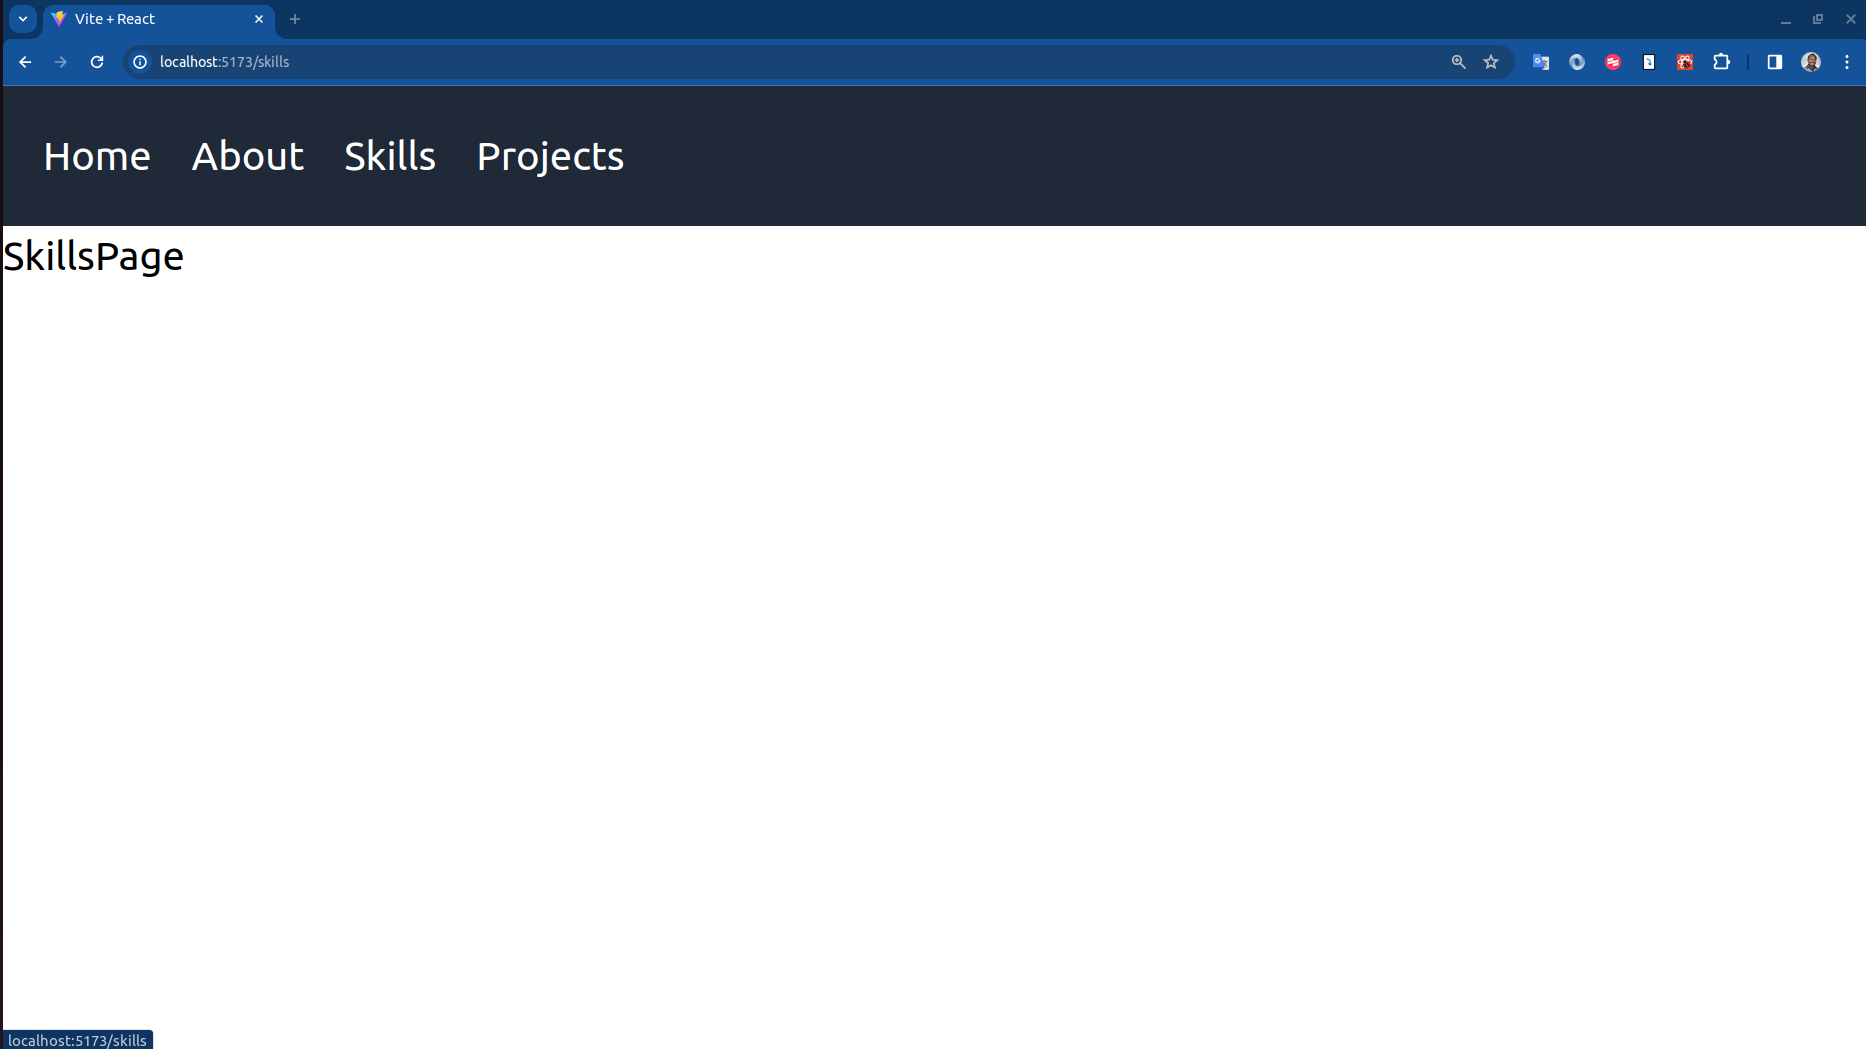 Navigation installation test Skills Page
Congratulations! You have successfully set up a React application with routing using the
react-router-dompackage.
Now let me introduce you to the Outlet component from react-router-dom.🤗
The Outlet Component
The Outlet component is used to display the child routes of a parent route.
In our case, the
Outletcomponent will be used in theNavbarComponentcomponent to display the child routes of the parent route.- Import the
Outletcomponent in theNavbarComponentcomponent. - Add the
Outletcomponent to theNavbarComponentcomponent below theulelement.
1
2
3
4
5
6
7
8
9
10
11
12
13
14
15
16
17
18
19
20
21
22
23
24
25
import { Link, Outlet } from "react-router-dom";

function NavbarComponent() {
  const links = [
    { path: "/", name: "Home" },
    { path: "/about", name: "About" },
    { path: "/skills", name: "Skills" },
    { path: "/projects", name: "Projects" },
  ];

  return (
    <nav className="bg-gray-800 text-white p-4">
      <ul className="flex space-x-4">
        {links.map((link, index) => (
          <li key={index}>
            <Link to={link.path}>{link.name}</Link>
          </li>
        ))}
      </ul>
      <Outlet />
    </nav>
  );
}

export default NavbarComponent;
- The other pages will be displayed below the navigation bar when you navigate to the different pages using the links in the navigation bar.
- What happens if we place the
Outletcomponent above theulelement? To find out, let us first adjust the
App.jsxfile as follows:Create a
Routecomponent with opening and closing tags for theNavbarComponentand set thepathprop to/.<Route path="/" element={<NavbarComponent />} ></Route>- Set the
elementprop of theRoutecomponent to<NavbarComponent />. - Remove the
pathprop from theRoutecomponent for theHomePage. - Write
indexin theRoutecomponent for theHomePageas follows:<Route index element={<HomePage />} />.- The
indexprop is used to specify the route that should be displayed when the user navigates to the root URL.
- The
- Move all the other
Routecomponents to theNavbarComponentcomponent.
1
2
3
4
5
6
7
8
9
10
11
12
13
14
15
16
17
18
19
20
21
22
23
import { Routes, Route } from "react-router-dom";
import HomePage from "./pages/HomePage";
import AboutPage from "./pages/AboutPage";
import SkillsPage from "./pages/SkillsPage";
import ProjectsPage from "./pages/ProjectsPage";
import NavbarComponent from "./components/NavbarComponent";

function App() {
  return (
    <div>
      <Routes>
        <Route path="/" element={<NavbarComponent />}>
          <Route index element={<HomePage />} />
          <Route path="/about" element={<AboutPage />} />
          <Route path="/skills" element={<SkillsPage />} />
          <Route path="/projects" element={<ProjectsPage />} />
        </Route>
      </Routes>
    </div>
  );
}

export default App;
- Your application should still work as expected. The pages should be displayed when you navigate to the different URLs.
- For the moment, we can style each page with Tailwind CSS and add some content to them.
Nano ID
Nano ID is a package that provides a way to generate unique IDs for elements in a React application.
- Install the
nanoidpackage withnpm install nanoid. - Import the
nanoidfunction in theNavbarComponentcomponent. - Use the
nanoidfunction to generate a unique ID for each link in theNavbarComponentcomponent.
1
2
3
4
5
6
7
8
9
10
11
12
13
14
15
16
17
18
19
20
21
22
23
24
25
26
import { Link, Outlet } from "react-router-dom";
import { nanoid } from "nanoid";

function NavbarComponent() {
  const links = [
    { id: nanoid(), path: "/", name: "Home" },
    { id: nanoid(), path: "/about", name: "About" },
    { id: nanoid(), path: "/skills", name: "Skills" },
    { id: nanoid(), path: "/projects", name: "Projects" },
  ];

  return (
    <nav className="bg-gray-800 text-white p-4">
      <ul className="flex space-x-4">
        {links.map((link) => (
          <li key={link.id}>
            <Link to={link.path}>{link.name}</Link>
          </li>
        ))}
      </ul>
      <Outlet />
    </nav>
  );
}

export default NavbarComponent;
Summary
In order to implement routing in a React application with the Browser Router from the react-router-dom package, you need to:
- Install the
react-router-dompackage. - Wrap the
main.jsxfile with theBrowserRoutercomponent. - Set up the routes for the different pages in the
App.jsxfile using theRoutesandRoutecomponents. - Set up the navigation bar with the links to the different pages using the
LinkandOutletcomponents.
Next Steps
- In the next stage, we will proceed as follows:
- Set up a
404page to display when the user navigates to a URL that does not exist.- Set up nested routes for the different pages.
- Set up a
Redirectcomponent to redirect the user to a different page when they navigate to a specific URL.- Set up a
useNavigatehook to navigate to a different page programmatically.- Set up a
useParamshook to access the parameters in the URL. This project demonstrates how to set up a React project with thereact-router-dompackage to enable routing in a single page application with Browser Router.