NextJS 14 - From ReactJS to NextJS Pt.1
Prerequisites
NextJS 14 requires that you have Node.js 18.17 or later installed on your machine.
I recommmend learning ReactJS before starting NextJS 14.
Installation
1
npx create-next-app@latest <project-name>
- answer the prompts to create a new NextJS 14 project for example (at the time of writing) the following prompts are available:
- would you like to use TypeScript? (y/N)
- would you like to use ESLint? (Y/n)
- would you like to use Tailwind CSS? (Y/n)
- would you like to use
src/directory? (y/N) - would you like to use App Router? (recommended) (Y/n)
The following message will be displayed after the project has been created:
1
2
3
4
5
6
7
8
9
10
11
12
13
14
15
16
17
18
19
20
21
22
23
24
25
26
27
Creating a new Next.js app in </path/to/your/demo-app.>

Using npm.

Initializing project with template: app-tw


Installing dependencies:
- react
- react-dom
- next

Installing devDependencies:
- autoprefixer
- postcss
- tailwindcss


added 138 packages, and audited 139 packages in 7s

34 packages are looking for funding
  run `npm fund` for details

found 0 vulnerabilities
Initialized a git repository.

Success! Created demo-app at </path/to/your/demo-app.>
</path/to/your/demo-app.>will be the path to the newly created NextJS 14 project on your computer.
- Open the project in your code editor. In my case, I will use Visual Studio Code.
- Run the following command to start the development server:
1
npm run dev
- you should see the following message in the terminal:
1
2
3
4
5
6
7
> demo-app@0.1.0 dev
> next dev

   ▲ Next.js 14.1.0
   - Local:        http://localhost:3000

 ✓ Ready in 1199ms
- unless some other app is using port 3000, you can open your browser and navigate to
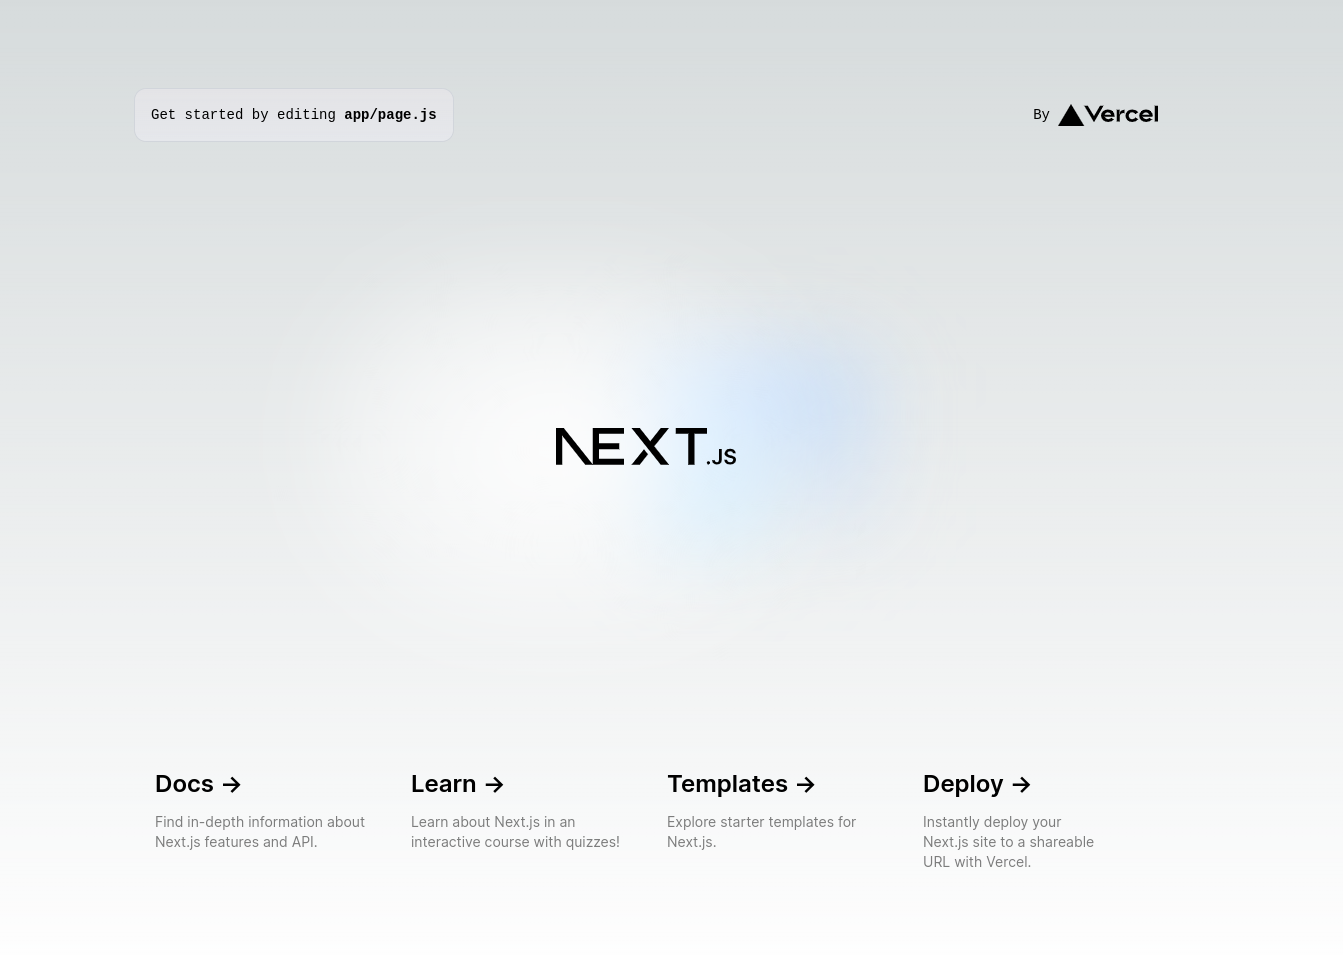
http://localhost:3000to see the default NextJS 14 app. Which at the time of writing looks like this:
Folder Structure
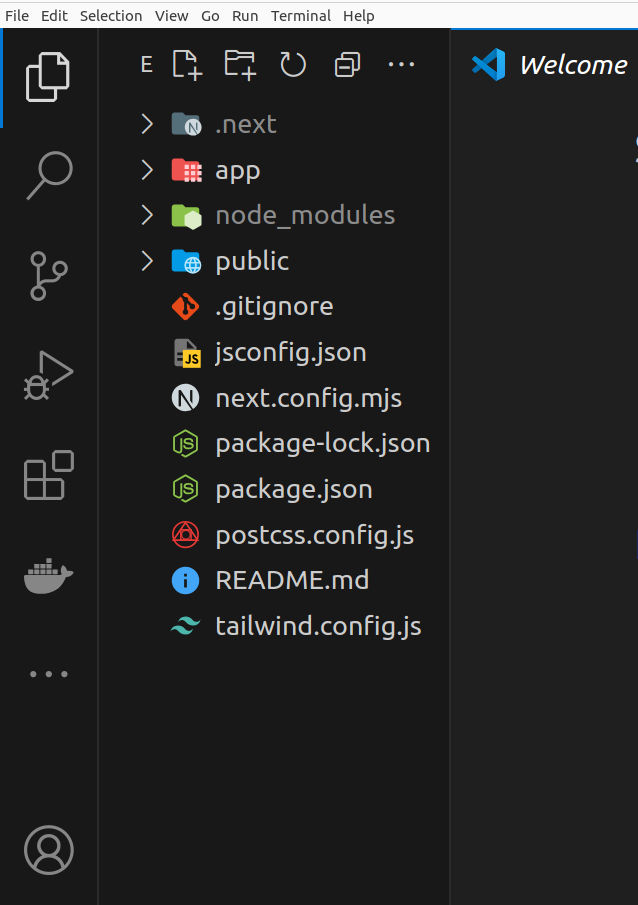
The default folder structure of a NextJS 14 project at the time of writing looks like this:
My folder icons look different because I use the Material Icon Theme in Visual Studio Code.
The folder I will focus on in this post is the app folder and the concept of pages and app-router in NextJS 14.
The app folder initially contains:
favicon.icoglobal.css- the global CSS file (like index.cssin a ReactJS app)layout.js- with which you can create a layout for your entire apppage.js- which is the"home"page for your app (likeapp.jsxin a ReactJS app)
Creating Pages in NextJS 14
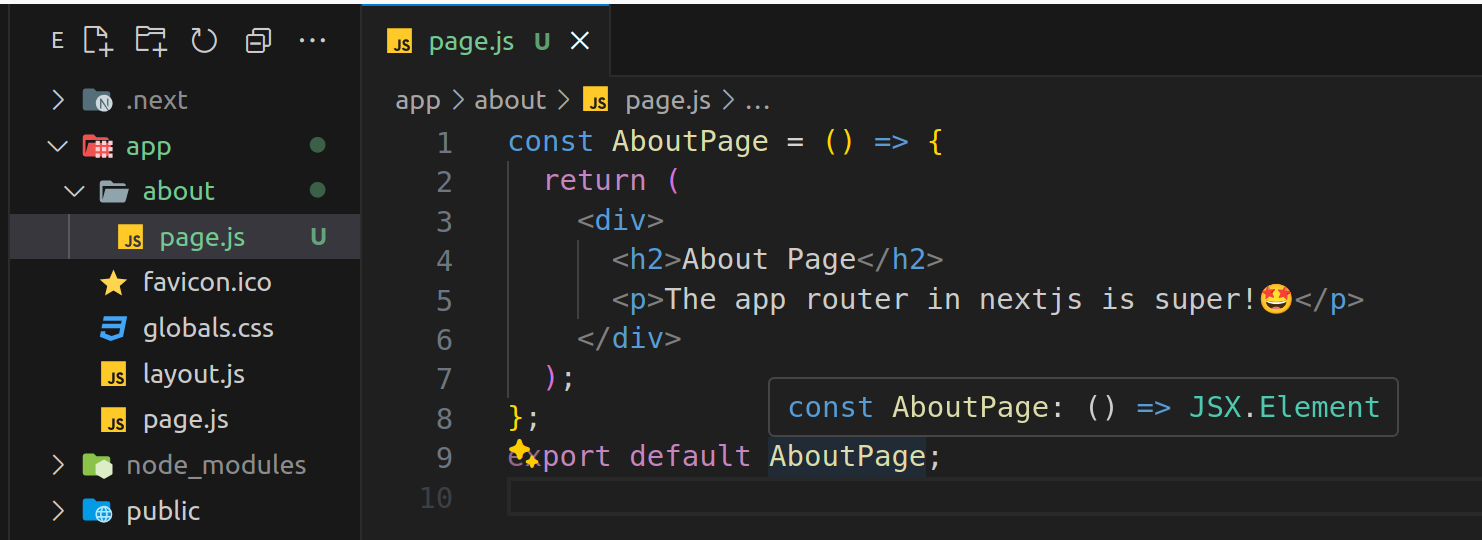
- Now let’s we wish to have an about page in our app, which when the user navigates to
http://localhost:3000/aboutthey will see. - all we need to do is:
- create a new folder in the
appfolder calledabout - then create a new file in the
aboutfolder calledpage.js - then create our usual ReactJS component in the
page.jsmaking sure to export it as the default export.
- create a new folder in the
- Now when you navigate to
http://localhost:3000/aboutyou will see the content of thepage.jsfile.
 NextJS14 App Routing on the browser
Can you create a new page in your NextJS 14 app?
Try creating a new page called
contactand navigate tohttp://localhost:3000/contactto see the content of thepage.jsfile.
Link Component
Congratulations! You have created a new page in your NextJS 14 app. But how do you navigate to the new page from the home page?🤔.
- You can use the
Linkcomponent fromnext/linkto create a link to the new page.- import Link from ‘next/link’ where you want to create the link.
- then use the
Linkcomponent to create the link to the new page. - the
Linkcomponent takes ahrefprop which is the path to the new page. - the
Linkcomponent takes aclassNameprop which can be used to style the link.
In this example, I will create a link to the about page from the home page.
Remember that the
homepage is thepage.jsfile in theappfolder.
- Open the
page.jsfile in theappfolder. Then add the following code to create a link to theaboutpage:
1
2
3
4
5
6
7
8
9
10
11
12
13
import Link from "next/link";

const HomePage = () => {
  return (
    <div>
      <h1 className="text-4xl">HomePage</h1>
      <Link href="/about" className="text-2xl text-purple-600">
        about page
      </Link>
    </div>
  );
};
export default HomePage;
- Now when you navigate to
http://localhost:3000you will see a link to theaboutpage. - Clicking on the link will take you to the
aboutpage.
Can you create a link to the
contactpage from thehomepage?Try creating a link from the
aboutpage to thecontactpage or from thecontactpage to thehomepage.
The concept of pages and app-router in NextJS 14
I will not go into the technical details of the app router, but it simply allows you to easily create and link pages in your NextJS 14 app.
- Take for instance that your app has:
- a
homepage - an
aboutpage - a
contactpage
- a
- With the
app-routeryou can easily create the pages by:- creating a new folder in the
appfolder for each page:home,about,contact - creating a new file in each folder called
page.js(the name MUST bepage.js) - then exporting the ReactJS component as the default export in the
page.jsfile - then you can easily link the pages using the
Linkcomponent fromnext/linkwith/<folder-name>as thehrefprop.
- creating a new folder in the
- This means that the folders name becomes a
pathfor the page.
What is a
pathin a NextJS 14 app?
- A
pathis the URL that the user navigates to in the browser to see the content of a page.- In a NextJS 14 app, the
pathis the name of the folder in theappfolder where the page is located.- For example, the
pathto theaboutpage ishttp://localhost:3000/about.
Creating a Navigation Bar
Let us now create a navigation bar for our NextJS 14 app to link to the home, about, and contact pages.
There are many ways to create a navigation bar, I will show you two ways:
- The beginner friendly way where everything is manually done in the
layout.jsfile in theappfolder.
- Open the
layout.jsfile in theappfolder. - Add the following code to create a navigation bar:
1
2
3
4
5
6
7
8
9
10
11
12
13
14
15
16
17
18
19
20
21
22
23
24
25
26
27
28
29
import Link from "next/link";

const Layout = ({ children }) => {
  return (
    <div>
      <nav className="bg-gray-800 p-4">
        <ul className="flex justify-between">
          <li>
            <Link href="/" className="text-white">
              Home
            </Link>
          </li>
          <li>
            <Link href="/about" className="text-white">
              About
            </Link>
          </li>
          <li>
            <Link href="/contact" className="text-white">
              Contact
            </Link>
          </li>
        </ul>
      </nav>
      {children}
    </div>
  );
};
export default Layout;
- In the code above,
- we’ve created a
navelement containing an unordered listulwith three list itemsli. - each list item contains a
Linkcomponent to thehome,about, andcontactpages respectively.
- we’ve created a
- The second method to me is better and more efficient. It makes our app easier to maintain and scale. We will:
- create a
NavBarcomponent in acomponentsfolder in the root of the project. - create an array of objects containing the
nameandpathof each page. - then map over the array to create the links in the
NavBarcomponent. - then import the
NavBarcomponent in thelayout.jsfile in theappfolder.
- create a
- The
NavBarcomponent will look like this:
1
2
3
4
5
6
7
8
9
10
11
12
13
14
15
16
17
18
19
20
21
22
23
24
25
26
27
28
29
30
31
32
33
34
35
36
37
// NavBar.jsx

import Link from "next/link";

const links = [
  { href: "/client", label: "client" },
  { href: "/drinks", label: "drinks" },
  { href: "/prisma-example", label: "prisma" },
  { href: "/tasks", label: "tasks" },
];

const Navbar = () => {
  return (
    <nav className="bg-base-300 py-4 ">
      <div className="navbar px-8 max-w-6xl mx-auto flex-col sm:flex-row">
        <li>
          <Link href="/" className="btn btn-primary">
            Next.js
          </Link>
        </li>
        <ul className="menu menu-horizontal md:ml-8">
          {links.map((link) => {
            return (
              <li key={link.href}>
                <Link href={link.href} className=" capitalize">
                  {link.label}
                </Link>
              </li>
            );
          })}
        </ul>
      </div>
    </nav>
  );
};

export default Navbar;
- The
layout.jsfile in theappfolder will look like this:
1
2
3
4
5
6
7
8
9
10
11
12
13
14
15
16
17
18
19
20
21
22
23
import { Inter } from "next/font/google";
import "./globals.css";

// alias
import Navbar from "@/components/Navbar";

const inter = Inter({ subsets: ["latin"] });

export const metadata = {
  title: "Next.js Tutorial",
  description: "Build awesome stuff with Next.js!",
};

export default function RootLayout({ children }) {
  return (
    <html lang="en" className="bg-base-200">
      <body className={inter.className}>
        <Navbar />
        <main className="px-8 py-20 max-w-6xl mx-auto ">{children}</main>
      </body>
    </html>
  );
}
Two other pages we may use very often are the 404- Not Found page and the loading page. We will see how to create and use them in the next posts.
Conclusion
I hope you have learned how to create a new page in a NextJS 14 app and how to create a link to the new page from the home page.
In following posts, I will try to create step-by-step tutorials on how to build complete projects with NextJS 14.
While waiting, you can visit the NextJS 14 documentation to learn more about NextJS 14.
Cheers! 🤗


