Introduction
In this tutorial, we will learn how to add Tailwind CSS 4.0 to a React Vite project.
Starting a New React Vite Project
- Start a new React Vite project.(If you already have a project, you can skip this step)
- Replace
my-react-vite-app with the name of your project.
1
| npm create vite@latest my-react-vite-app
|
Select the React from the template options (with the “up or down” Arrow key on your keyboard) and press Enter.
- Select the JavaScript from the language options (with the “up or down” Arrow key on your keyboard) and press Enter.
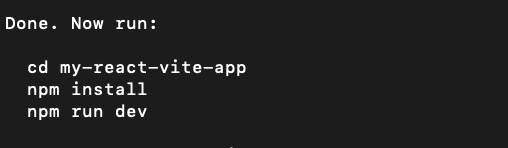
- Change the directory to the project directory.(the 3 commands are also already written in the terminal after the project is created as shown in the picture below)
Next Commands after vite has set up the project
- based on the image above, the next commands to run are:
cd my-react-vite-app to change the directory to the project directory.
npm install to install the dependencies.
- finally
npm run dev to start the development server. BUT before running the command, I will like to add Tailwind CSS 4.0 to the project first.
Adding Tailwind CSS 4.0 to the React Vite Project
Note: The following steps are for adding Tailwind CSS 4.0 to a React Vite project
- Install Tailwind CSS 4.0 and its dependencies.
1
| npm install tailwindcss @tailwindcss/vite
|
- Configure TailwindCss in the
vite.config.js file.- import tailwindcss from
@tailwindcss/vite at the top of the file. - Add the
tailwindcss plugin to the plugins array.
1
2
3
4
5
| // add this line at the top of the file
import tailwindcss from "@tailwindcss/vite";
// add the tailwindcss plugin to the plugins array
tailwindcss(),
|
- The
vite.config.js file should look like this:
1
2
3
4
5
6
7
8
| import { defineConfig } from "vite";
import react from "@vitejs/plugin-react";
import tailwindcss from "@tailwindcss/vite";
// https://vite.dev/config/
export default defineConfig({
plugins: [react(), tailwindcss()],
});
|
- Import the Tailwind CSS styles in the
index.css file.
- Write the Tailwind CSS classes in your component e.g in App.jsx
1
2
3
4
5
6
7
8
9
| function App() {
return (
<>
<h1 className="text-3xl font-bold underline bg-red-600">Hello world!</h1>
</>
);
}
export default App;
|
- Start the development server.
- The development server will start and you can see the Tailwind CSS styles applied to your project.
- This is what I see in my browser after running the development server. Do you see the red background color and the underline on the text?
UI with Tailwindcss Styling
 Next Commands after vite has set up the project
 UI with Tailwindcss Styling